DKIM records are a very important part of all email security strategies so you should understand how to create them for multiple DNS platforms. In this post we will talk about adding the DKIM record to Google Cloud DNS.
You should already be setup with Google Cloud DNS and should already have a zone created for the domain you want to generate the DKIM record for.
First lets create the DKIM record that we want for our domain.
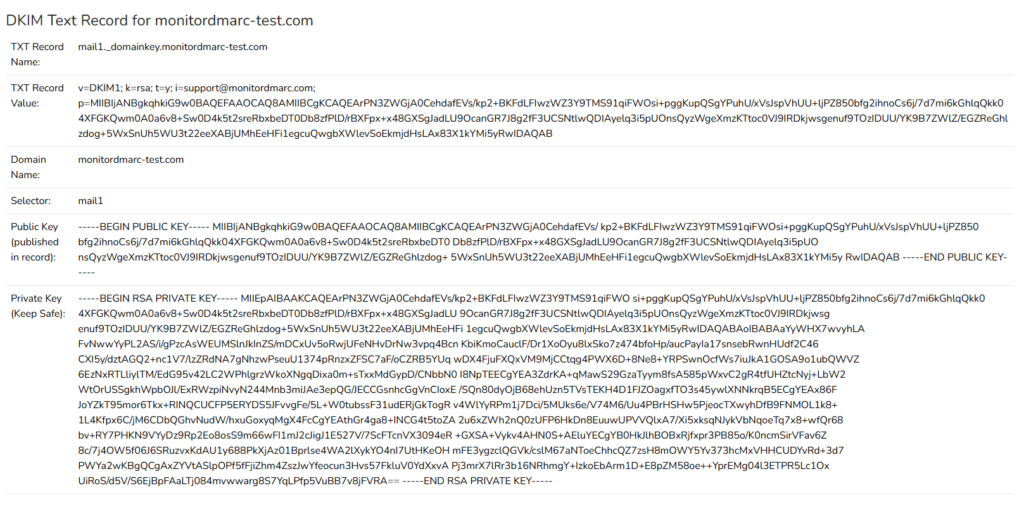
Using the MonitorDMARC DKIM generator (or whichever one you would like) put in the information you want.

Now DKIM is a little more complicated than just a DNS entry. The other part of DKIM is signing your emails with the private key that is generated here. This is something that you will need to setup on either your mail server or with your ISP or else DKIM validation will fail. We are not going to go over setting up DKIM on mail systems in this post but I will in other posts later on. For now we will just create the DNS record.

One key point here is to make sure that you copy down the “Private Key” that is generated and keep it safe. The private key is how you will sign your emails as they leave your environment. If you notice the “TXT Record Value” contains the Public Key. This is how ISPs like gmail will validate the signature of your email.
Now that we have our record lets go to Google Cloud DNS to add it.
From within your DNS zone click “Add Standard”


Fill in the information that was provided from the MonitorDMARC DKIM Generator. DNS Name should be your selector name ._domainkey where ours was mail1 so mail1._domainkey. The “Resource Record Type” should be TXT and the TTL information can be whatever you like. The TTL information is more important if you record will change frequently.
Some DNS providers including Google only allow a single TXT record entry of 255 characters. Because our full record is longer than that we need to split the entry record into two different TXT Data entries.
Click the “Create” button and you have now successfully set your SPF record.
Don’t forget to add monitoring to your domain through MonitorDMARC’s domain record monitoring.

