BIMI records are a very important part of all email security strategies and branding so you should understand how to create them for multiple DNS platforms. In this post we will talk about adding the BIMI record to Cloud Flare DNS.
You should already be setup with Cloud Flare DNS and should already have a zone created for the domain you want to generate the BIMI record for.
First lets create the BIMI record that we want for our domain.
Using the MonitorDMARC BIMI generator (or whichever one you would like) put in the information you want.

Click Generate BIMI and MonitorDMARC will generate the BIMI record for you and offer any suggestions.

Notice I am not providing a VMC Uri here because I do not have a VMC certificate. If you have gone through the process to verify your logo and have a valid VMC certificate URI you should put that in.
Now that we have our record lets go to Cloud Flare DNS to add it.
From within your DNS zone click “Add Record”
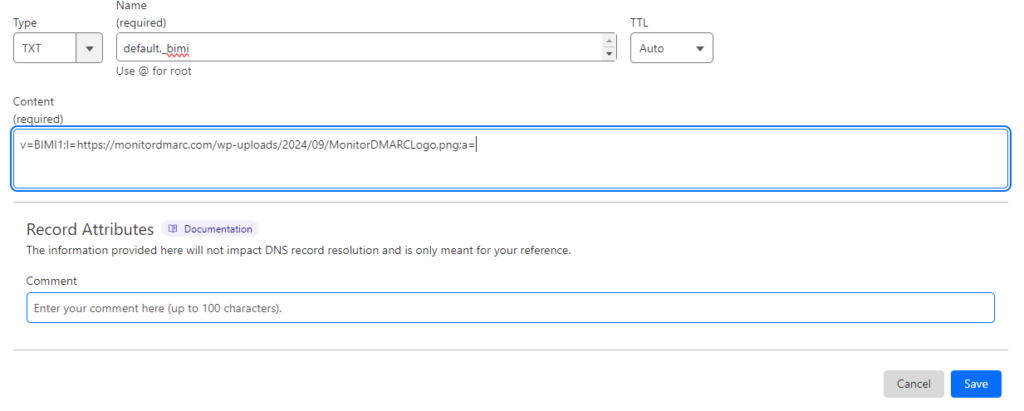
Here you will want the DNS name to be “default._bimi”. The “Type” should be TXT and the TTL information can be whatever you like. The TTL information is more important if you record will change frequently.

Next on the “Content” line add in the BIMI record we generated earlier.
Click the “Create” button and you have now successfully set your BIMI record.
Don’t forget to add monitoring to your domain through MonitorDMARC’s domain record monitoring.

